
I have been using my current
Mandeville designed big brake kit for a few years now
with great success. A terrific cost effective upgrade. However when I was given the
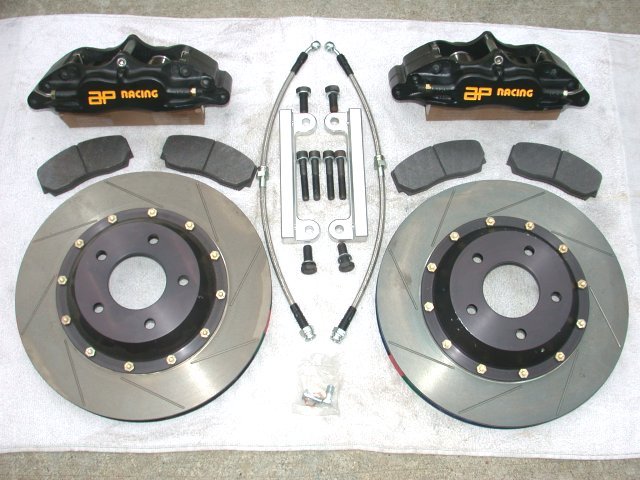
opportunity to secure an AP Racing kit I simply couldn't pass it up. Benefits? There are a
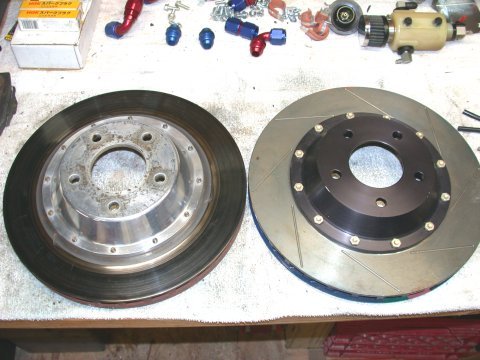
few but they aren't necessarily immediately apparent. For example, the rotors used by
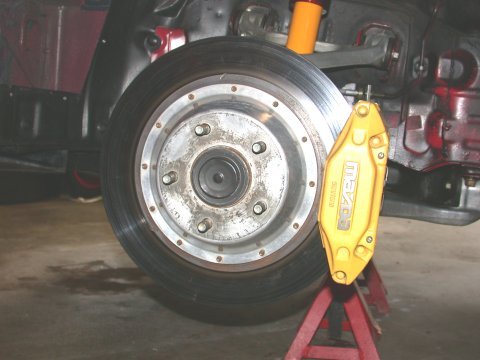
the NTech kit and the Mandeville kit are identical in dimension. The benefits, as one
might guess, are in the caliper. The Mandeville kit uses a modified OE caliper which
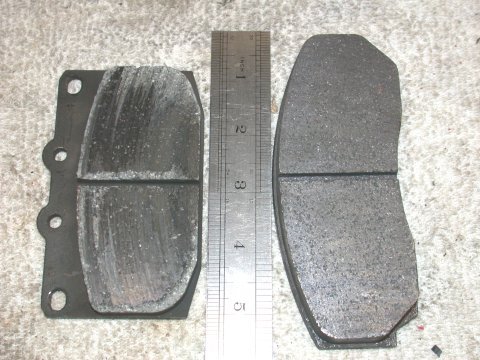
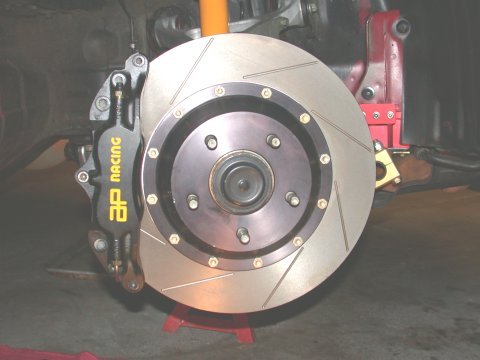
results in a slight pad to rotor surface overhang - unused pad as it were. The AP
calipers on the other hand fit as designed and make full use of all the pad. Score one
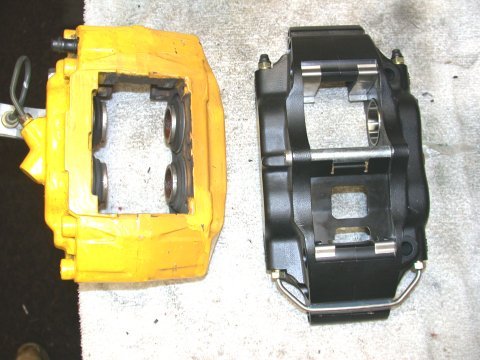
for the AP's. As for caliper rigidity and flex of the OE units vs the AP's I'd think
the delta is negligable. Both are very stout monoblock designs.
Perhaps the biggest difference is in the pad.
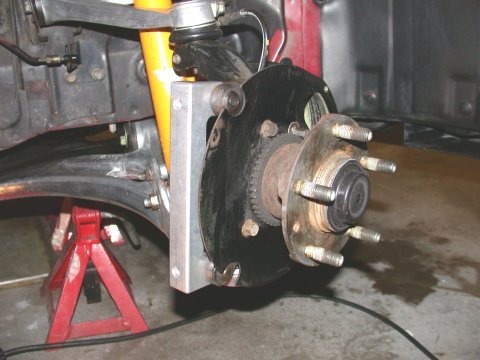
Of all the things on my car I've spent the most time with it has to be the brakes. I could do an entire brake swap in a few hours. This is, relatively speaking, an easy modification to perform. Some basic things I do when disassembling the brakes entirely: cap the brake line with a rubber cap to minimize the amount of fluid lost and propensity to get air in the line and also soak all the existing mounting bolts in PB Blaster or equivalent prior to trying to remove them. Heat and rust can make these tight and the last thing you want to do is snap a bolt. In this general order: remove the pads and hardware, disconnect the brake line at the caliper and cap the end, and unbolt the caliper (2 14mm bolts IIRC). Simple. The new caliper bracket installs where the OE caliper was mounted - common sense. The thing to look for is that the caliper when mounted to the bracket is centered on the rotor surface. The NTech kit includes shims so this can be accomplished. Assembly and disassembly might be needed a few times to get it right.
| Once the caliper is mounted to your satisfaction, install the brake lines. Now as always aftermarket parts rarely if ever fit perfectly. And as was the case with this kit the SS lines were wrong. No biggie, just an extra 30 minutes of effort and all fit fine. The problem, the center "clip" that afixes the line to the shock was backwards. The lines have a banjo fitting on one end so cannot be simply reversed like the stock lines. This meant a bit of filing on the shock brake line tab to accommodate the reversed "clip" on the SS line. The spring retainer is now on the front of the mounting tab. |
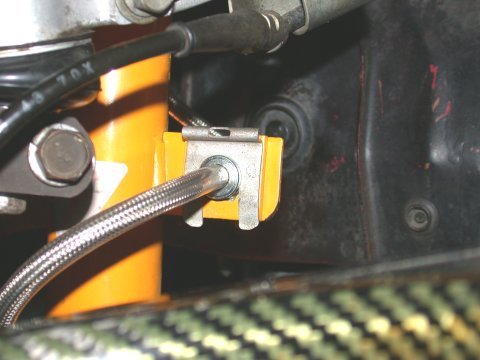 The reversed mounting of the SS line and spring retainer. |
|---|
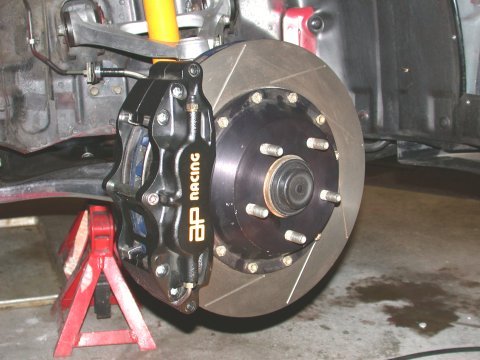
When installing the new brake lines I connect the line to the caliper first then the fender connection. That way you are only screwing around with one connection getting brake fluid everywhere vs two if you connect the fender end first. Once everything is connected it's simply a case of bleeding the system as normally. Note the AP calipers have two bleed screws. The outer bleed screws should be used first. And of course after bleeding check all brake line connections for leaks.
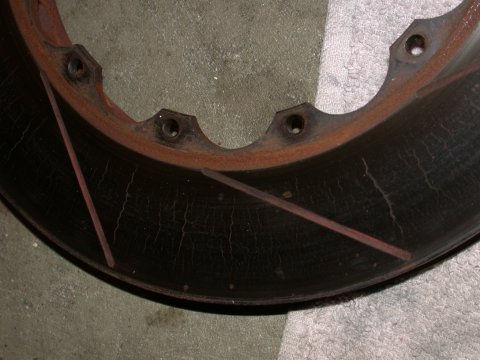
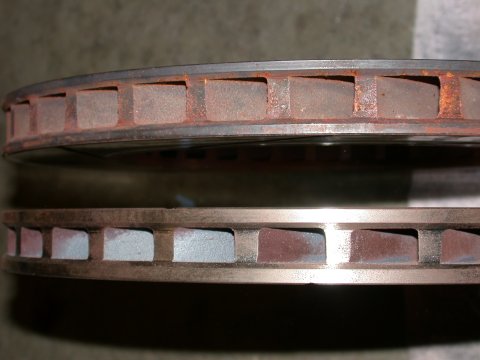
As with all consumable items there comes a time for replacement. And with stickier tires (Hoosiers) and an increase in the speeds I'm attaining on the track I wore out, more like cracked, the first set of brake rotors for this AP kit a little bit sooner than I had hoped. Although not cracked to failure the heat cracks that were originally just surface cracks were now so deep and wide I could easily fit a finger nail into them. So I felt compelled to replace them. I won't delve into the many metallurgical aspects of what makes a good brake rotor other than to say there is quite a variety available. It just takes some time to hunt down the approrpaite sources and to have a definitive answer to what it is you actually need, both in the way of size and use. As is with most vendors that are unwilling to share details of their products, obtaining the specs of the rotors supplied with the kit was impossible. I want to know what it is I'm buying. However by contacting Coleman Machine (1-800-221-1851) they can provide you with instructions on how to measure a brake rotor such that they can replicate it for you. As it turns out the rotors in need of replacement can be machined from off the shelf blanks that Colemen keeps in stock. Similarly, this technique can be used to obtain rotors from Brembo and APRacing and others if you desire. The question then becomes one of cost. Data was somewhat sketchy as to which rotors are more durable and last longer and I had used Coleman rotors with moderate success with my old Mandeville setup so I decided to go with Coleman. Note also that the expensive AP rotors I had that also had be cryogenically treated cracked before wearing out. The Coleman rotors seemed to be fairly durable and the cost was appropriate at $335.00 shipped for the two front rotors (rotors themselves are $122 each) and which including the mounting hardware. This cost included stress relief and gas slotting (and shipping). Cryogenically treating rotors will reduce the wear rate but IMO the cost does not justify the gain given the inexpensive nature of brake rotors. What was new to me, and apparently new to Colemans inventory was that they were now supplying both a light duty and heavy duty rotor in the size I was looking for. The difference being the thickness of the rotor face. The heavy duty rotor sacrifices vaned vent area for the thicker rotor material. In theory more rotor material to act as a heat sink needed to slow a heavier car. Whereas for the lightweight rotor, a car making lesser stops with less cooling time in between might get away with the lightweight rotor - less heat sink but cools faster versus a heavy car making BIG stops from high speeds but having lots of cooling time between these stops might warrant the heavy duty rotor. Either way it's a tradeoff but I decided the heavy duty rotor fit my needs more than the lightweight rotor.
The specs for the rotor are as follows:
DV32-1300-150 custom solid mount (heavy duty)
1.1" thickness, 13" outer diameter
7.48" flange diameter, 8.625" eye diameter
0.250" hole, 12 bolt, 8.0" bolt circle
0.220 flange thickness
1 left and 1 right (they are directional)
stress relieved and gas vented 8 per/side opposite of vanes
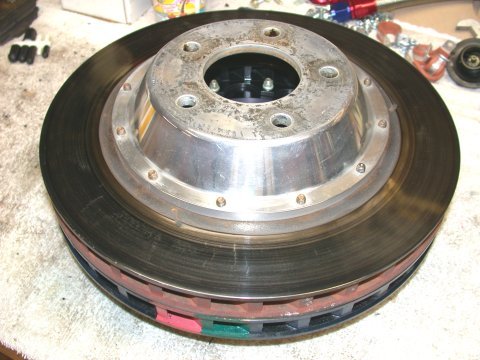
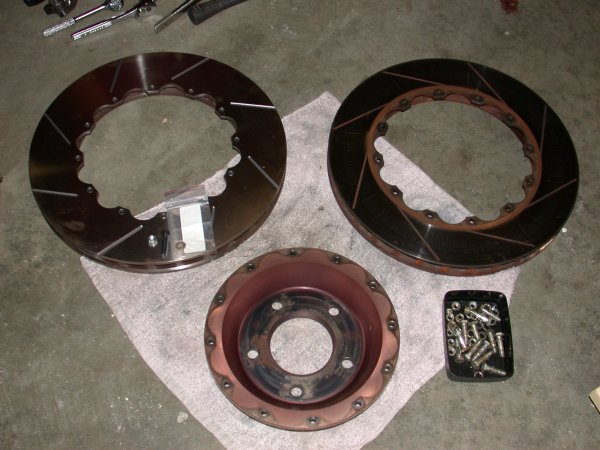
Mounting of the new rotors to the old hats is a simple affair provided certain precautions are taken.
The hat to rotor interface must be spotless. If you feel it necessary the hat can be tested for runout.
The old rotor may be holding the Aluminum hat in true such that without the old rotor attached, the hat
reverts to it's relaxed "warped" state. This can make a perfectly true set of new rotors take
on a warp when mounted to the old hats. Note also how hot the hats can get. My hats were anodized
black originally but with the heat are now a pinkish color. It is a common misconception that rotor
hats (for two piece rotors) are good for the life of the car. They may need to be replaced if the holes
are worn or stripped from heat expansion/contraction, cracked, or simply out of true. My original AP rotors
supplied with the kit came with nice but VERY expensive NAS mounting hardware. Replacing the hardware of this
quality would have alone cost $111.60 - each NAS bolt is $3.70! I sided with the Coleman sales rep who stated this
hardware was overkill and that good quality Grade 8 hardware as listed below would be perfectly sufficient and
at a fraction of the cost ($28.80). Rotor mounting hardware should NEVER be reused. Once the bolts are stretched
during installation and subsequently heat cycled they loose much of their stength and cannot be reused. Mounting the hats is
done the same way you mount a wheel using a star pattern tightening gradually. I used a three step process
torquing to 75, 150, and then to 200in-lbs. I had no issues with new warped rotors. They were true from the first time
on track. On a sidenote I am exploring installing dedicated brake ducting. The AP brake rotors were cracked from heat
abuse and not worn out from use. The CWR carbon fiber brake ducts, although more effective than the OEM heat *shields*, are not up
to the task of cooling heavily used brakes on the track.
The new hardware recommended and supplied by Coleman with my new rotors:
bolts: bolt, shcs, 1/4-20x1
lock: nut, lock, 1/4-20, gr C
washer: Washer, 0.500x0.265x0.063 yz
TRIPLE-R
MAIN PAGE
GENERAL
OVERVIEW | THE
HEART OF THE BEAST | STOPPING
AND TURNING | THE
COMFORT ZONE