
One of the few remaining parts of an RX7 that I have not laid my hands on is the engine.
(The transmission and differential being the others) I've always been curisous as to what is involved
and just how difficult it really is to rebuild a rotary engine. Since I've blown up two engines recently
(destroyed oil contorl rings in the ITS FC racecar and lost an apex seal in the FD) I thought it
about time I learnt! If you have been following my ITS racecar buildup you may have recalled I purchased
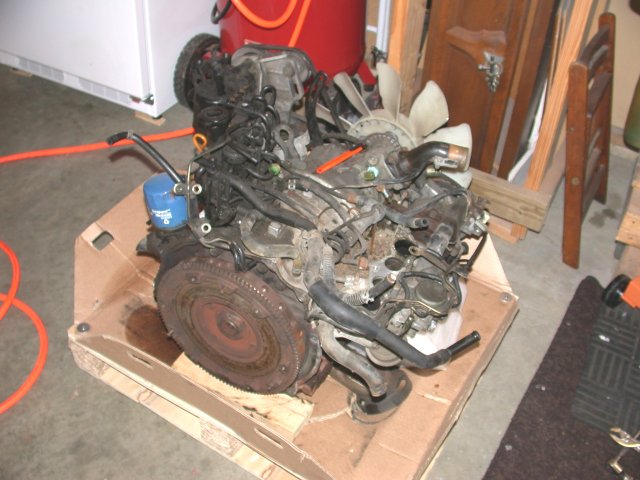
a "running" Series 5 Fc NA motor off eBay for a couple hundred bucks. Turns out I was scammed. Although it was
essentially a complete long block and I was able to use all the intake manifolds and components and resell some of
the unused items the core engine was essentially junk having lost an apex seal (all the apex seals actually)
in one of the rotors. A perfect candidate for a rebuild project. In summary I spent 45 minutes tearing down
the engine (NOT including the 45 minutes ot get the flywheel off - nothing heat, a 3 foot cheater bar,and a cold
chisel and 5 lb steel mallet won't fix - And before you ask I hammered it for 15 minutes with an impact wrench set at 140psi: NOThING),
about TWO WEEKS cleaning all the components (every single nut and bolt was wire-wheeled to remove rust and dirt) , a few hours
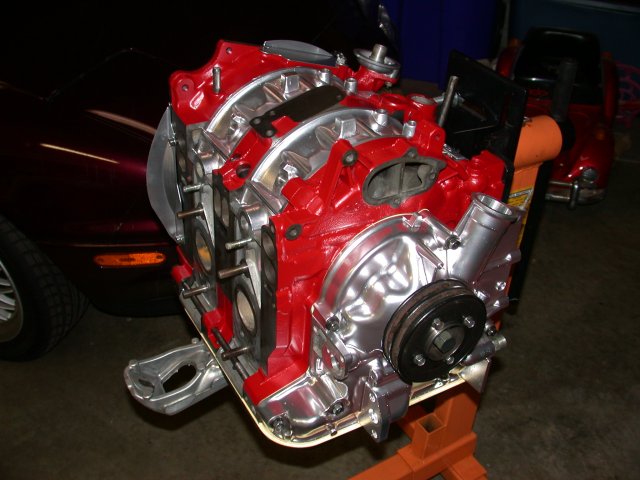
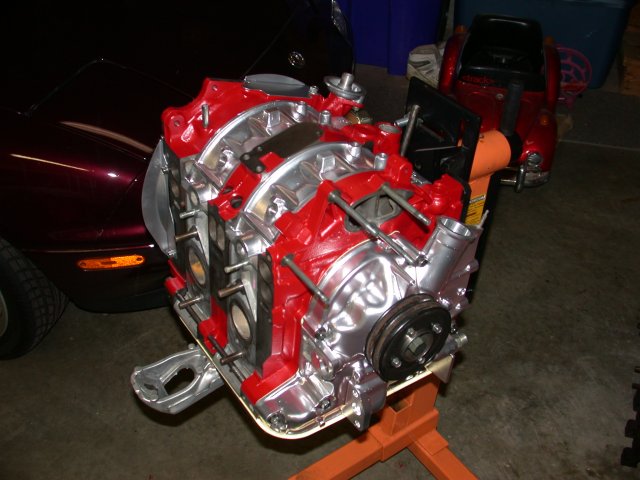
checking tolerances and clearences, another 2 weeks sourcing replacement parts, and about 4 hours reassembling
the engine. Not to bad all told.
Before beginning I watched two different rebuild videos, Bruce Turrentine's and another I had on a 4 DVD set.
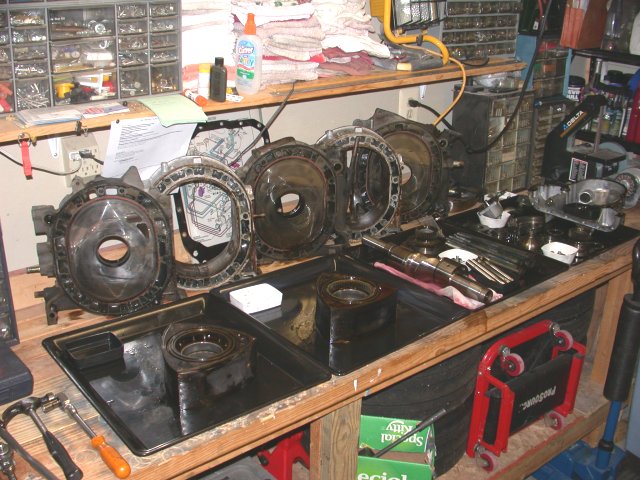
Both very helpful...and I watched both at least 2 times. I also cleaned a big enough workspace to
handle all the parts. It's quite important to keep at spotless place to assemble the components. Just one peice
of stray dirt of carbon can jam a seal. I used a rubber mat to assemble the parts on and avoid damaging any
flanged surface.
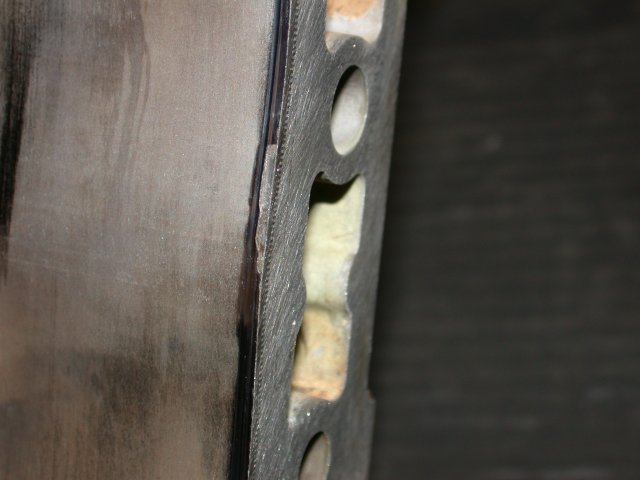
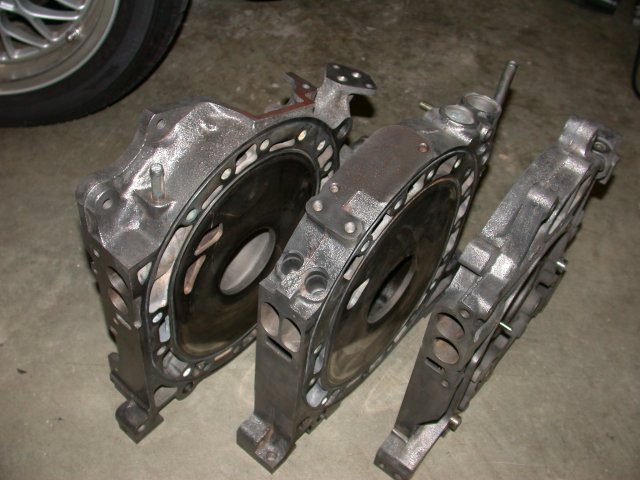
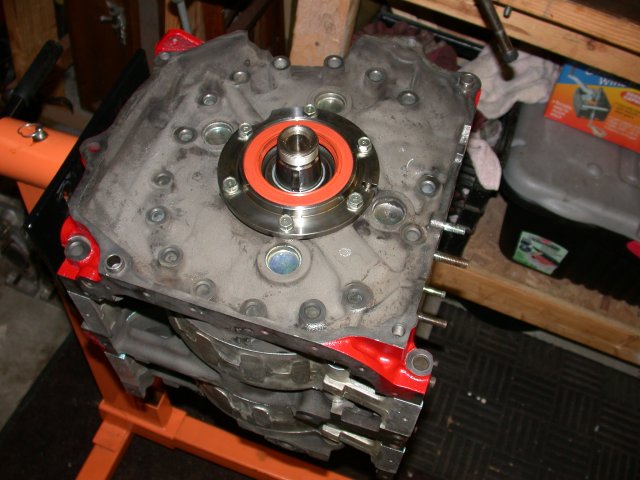
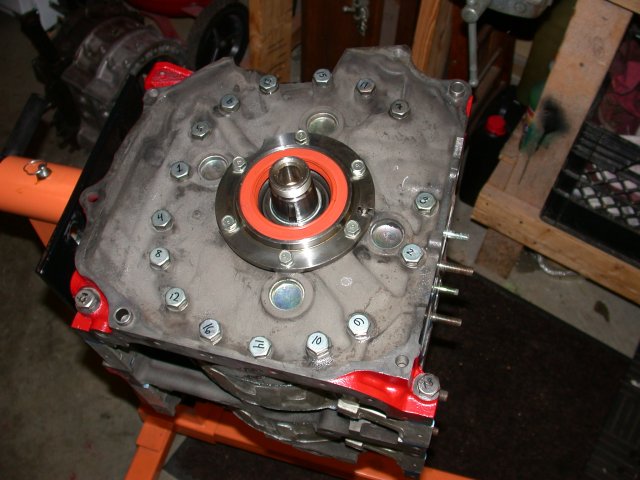
After tearing down the motor it was determined that both rotor housings were bad - the one the the lost apex
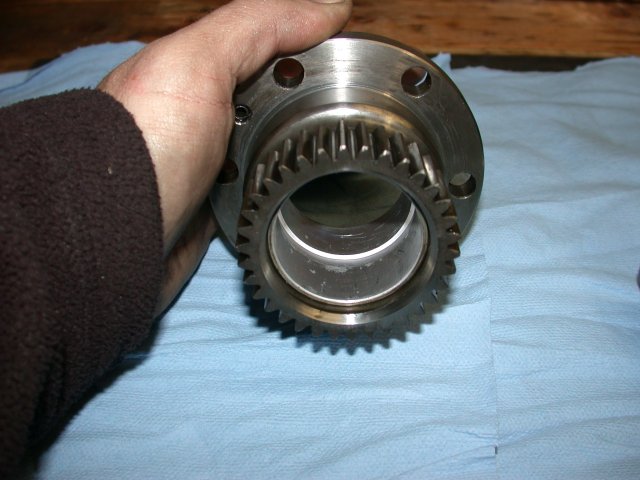
seal was obviously toast and the other housing was extremely worn. I replaced the bad rotor due to apex
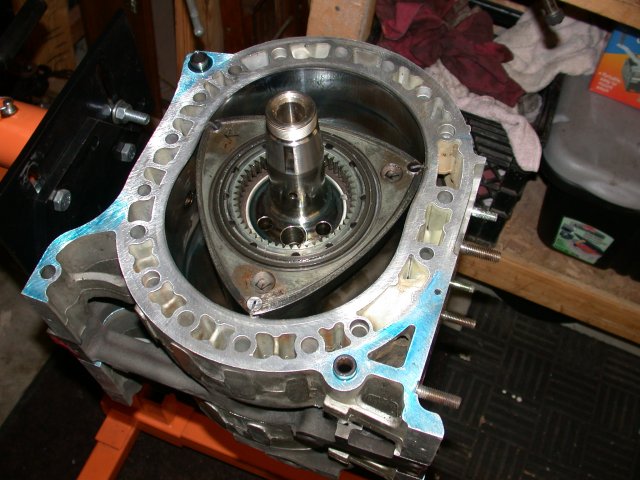
seal damage, and swapped out and clearanced new stationary gear bearings. The side and center housings were
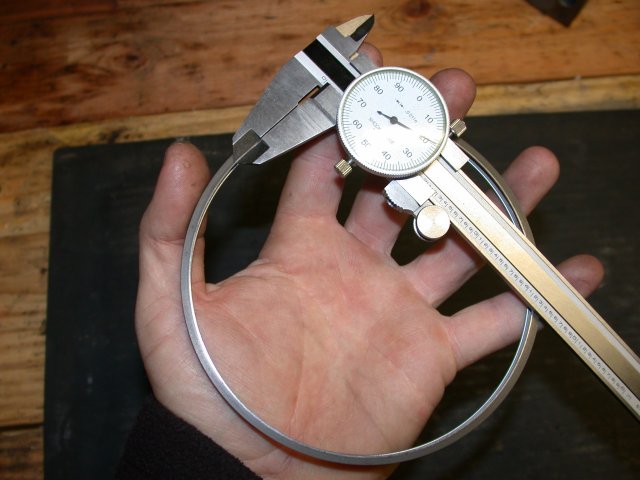
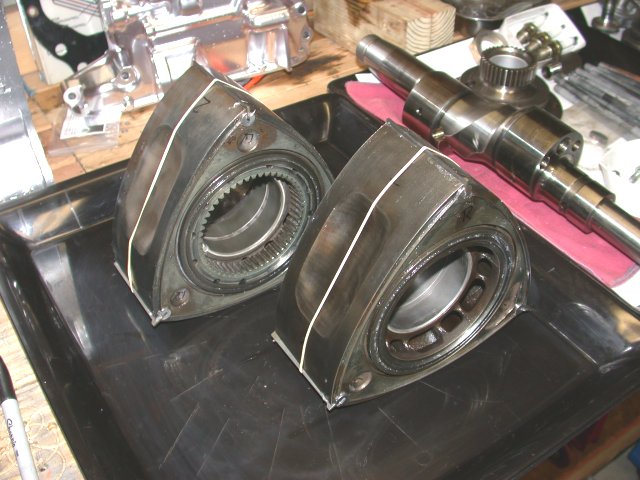
worn but still within spec. I used all NEW apex seals and solid corner seals, new springs (corner, side, and
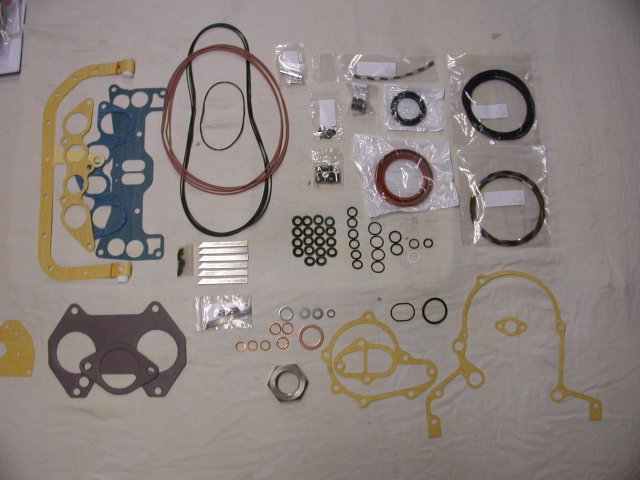
apex seal) and of course new gaskets and o-rings EVERYWHERE. I used new OEM water jacket seals. The spacer
was replaced to bring end float back to within spec. The gasket and rotor kits were bought from Atkins Rotary.
To be honest I spent $665 on the new gaskets and seals from Atkins, another $100 from Mazdacomp for bearings
and the spacer, and a couple $hundred for the used rotor housings and rotor. Good used rotor housings are
VERY hard to find. I found one pristine housing with NO chromium flaking and the other had one VERY small
chip. There was no wear around the exhaust port and no grooving anywhere on the housing surface. I got lucky.
The used rotor was obtained from a friend and luckily matched the weigth code (both were C's)
of the rotor I had from my junk core. Add to this the junk core motor I probably have about $1200 in the
rebuild in parts. Not bad compared to the $2450 for a Mazda remanufactured engine.
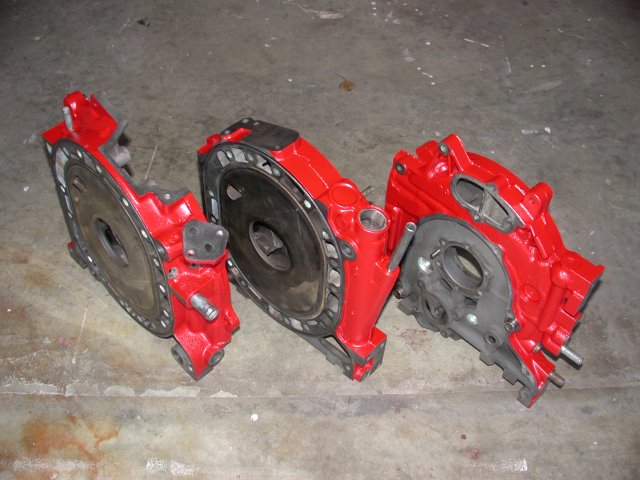
I also spent at least another $40-$50 on consumables - Hylomar, paint, parts
cleaner, wire brushes, gasket remover, shop towels, 2 stroke oil, petroleum jelly, etc. And another $250 on specialty tools. The tools
however can be reused so I don't necessarily consider these as a REAL cost...but you still need to have them.
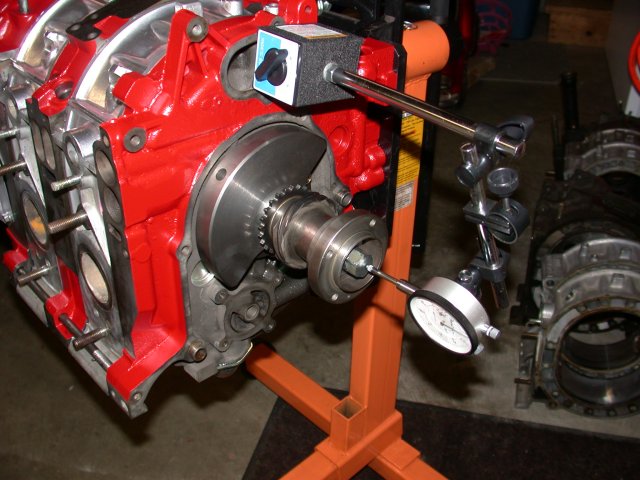
Besides I'm always looking for an excuse to buy tools. Included was a set of Micrometers (0"-1", 1"2",
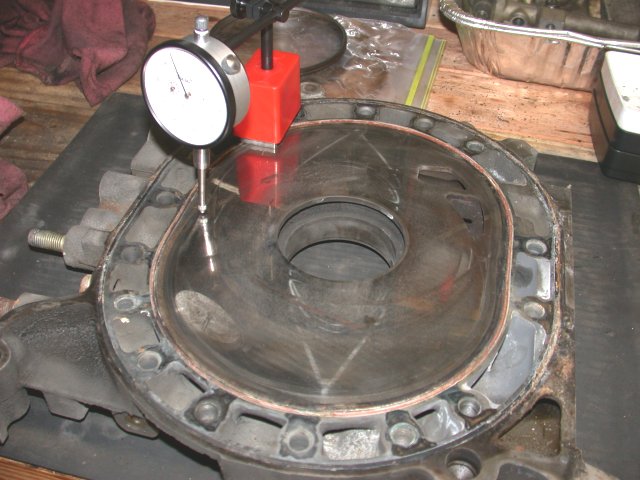
and 2"-3") and large micrometer (3"-4") and 6" dial caliper, a precision 24" straight edge, feeler gauges, dial indicator
and magnetic base (I bought two magnetic bases because the first one was a cheap POS),
6 piece set internal telescopic gauges 5/16"-6", a set of grinding stones (for the side seals),
stationary gear bearing tool (from Atkins - VERY helpful). I also bought a set of
picks and scrapers for cleaning the engine internals. I already owned an engine stand and borrowed the
rotary engine stand adapter (Atkins I beleive) from a friend. I wanted to but did NOT buy a parts cleaning wash tank,
a blasting cabinet, or a 7 ton press. But enough of my babbling....on to the pics. Note that these are a the mere
tip of the iceberg of what is entailed in a rebuild but hopefully will give you a flavor for what I did.
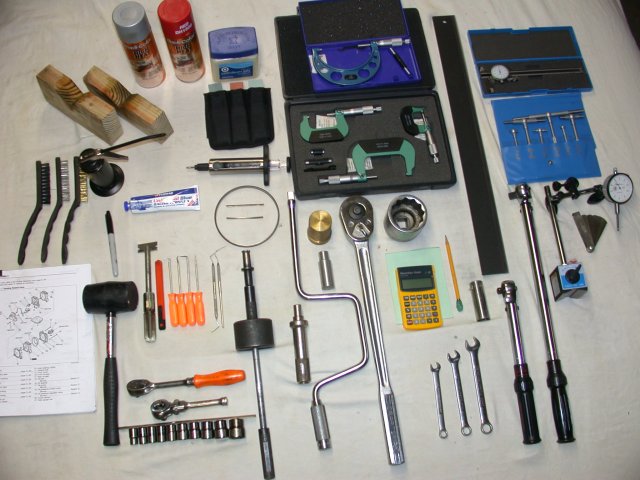
The tools pictured include: Factory Service Manual pages on engine assembly, assorted wire brushes (brass, steel, and plastic),
rubber mallet, Sharpie (for marking rotors) oil can with 2 stroke oil, eccentirc shaft stands (wood "V" blocks),
tube of Hylomar, ceramic paint for sprucing up the exterior bits, razor blade scraper, exacto-knife,
various picks and dental tools, 3/8" drive ratchets and metric socket set, Mazda pilot bearing puller,
Mazda pilot bearing and seal installer, old oil control ring (to press in new rings when assembling rotors),
old apex seal and piece of side seal (for cleaning apex seal and side seal grooves), petroleum jelly, syringe
filled with petroleum jelly (for loading seal grooves), wet stones for "shortening" side seals, 3-4" outside micrometer,
micrometer set (0-1", 1"-2",and 2"-3"), stationary gear bearing installer, Aluminum shaft (for locking engine while
loosening/tightening e-shaft bolt, used dowel will also do), 1/2" drive speeder bar (for spinning in tension bolts),
BIG 3/4" drive ratchet, BIG 3/4" drive 1 5/8'socket for flywheel nut (not shown - cheater bar, torch, BFH, blood, sweat,
and tears), calculator and paper/pencil (for calculating those tolerances), 10mm, 12mm, and 14mm combo wrenches,
17mm 1/2" drive socket (tension bolts), 3/8" drive torque wrench, 1/2" drive torque wrench, 24" precision
straight edge, set of internal telescopic gauges, dial caliper, dial indicator with magnetic base, feeler gauges.
Not shown are the DVD and VCR tape assembly videos, drill with assorted wire wheels for cleaning rusty parts, the Dremal tool with small wire wheels for those hard to reach places, the parts fluid, cleaner, and pans, masking tape for the painting, the engine stand and rotary adapter plate, reams of shop towels, trays and bins to organize parts and keep them ready after cleaning, rubber bands for holding seals in place on the assembled rotors, a rotor bearing tool (I didn't need one), air compressor and air nozzle, the internet for finding out answers to all those weird questions, a friend with access to a hydraulic press, and lots of time and an understanding significant other.


7-UP CLUB
MAIN
OUR "LOCAL7"
COMMUNITY | THE
WORLD OF THE RX-7
This page last updated November 22, 2006