Wanna try your own alignment? It's not too hard, and after a couple of times
of doing it, you can do a check in under 30 minutes.
The steps I outline here allow you to check toe and camber in a pretty
repeatable way (within 0.5mm toe, 0.1 deg camber) with tools that cost a
total of maybe $50.
Disclaimer: Any alignment you do with reference to this page is your work. I
use this proceedure on my own cars with no problems. So if you attempt to do
the alignment, don't blame me for any problems that may arise.
With that out of the way, let's get started!
It's important to make sure the area you are checking the alignment in is
reasonably level. You can do this my running a string from 2 jack stands that
are placed approximately where the car wheels are. Measure from the string to
the floor very close to both jack stands, and make sure the measurements are
even. Then take a level, and line it up with the string to see how level
things are. If that's a pain, use a nice straight 2x4 across the stands.
It's much easier to check the level on the 2x4 too.
Now that you have a nice level area, drive the car in. Do so as straight as
possible, as turning the wheel even a little will pull/push a tire a bit and
affect your alignment. If you have to turn, just make sure to bounce the car
a good bit before running the check (I bounce from the door rails).
TOOLS:
Toe:
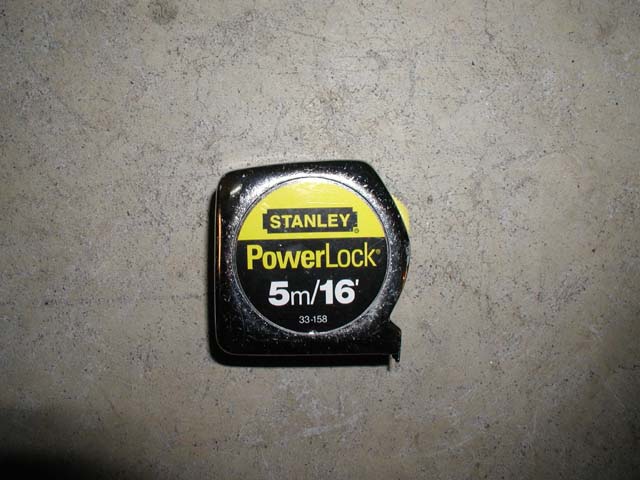
tape measure
Toe:
length of string
Toe:
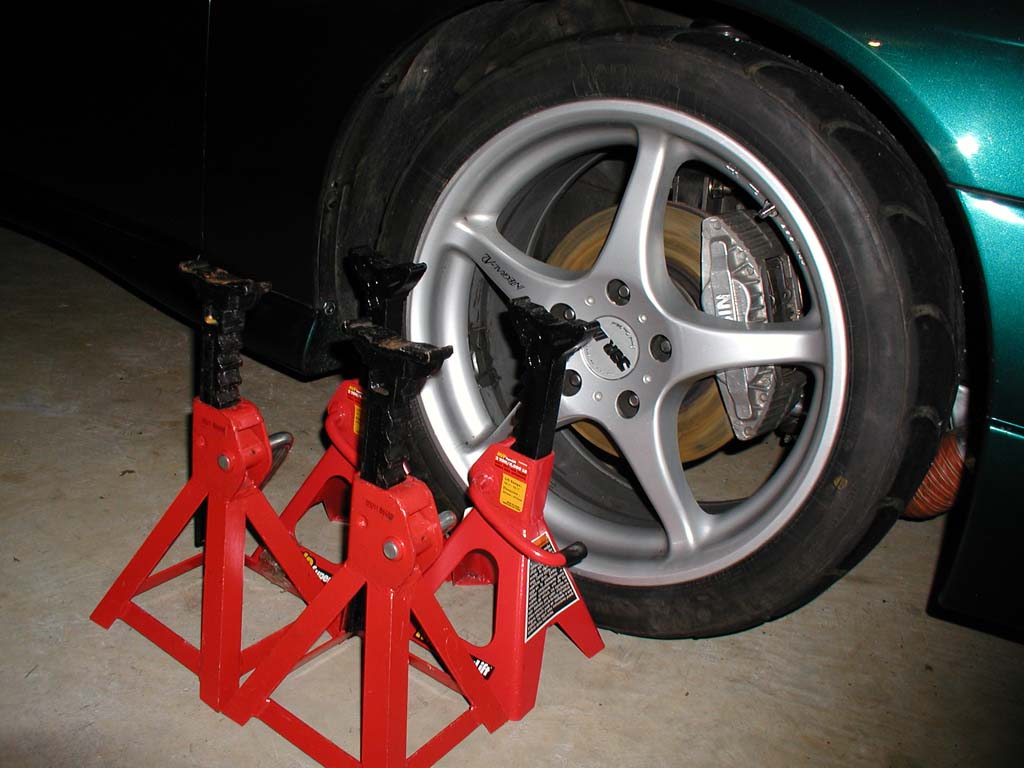
jack stands
Camber:
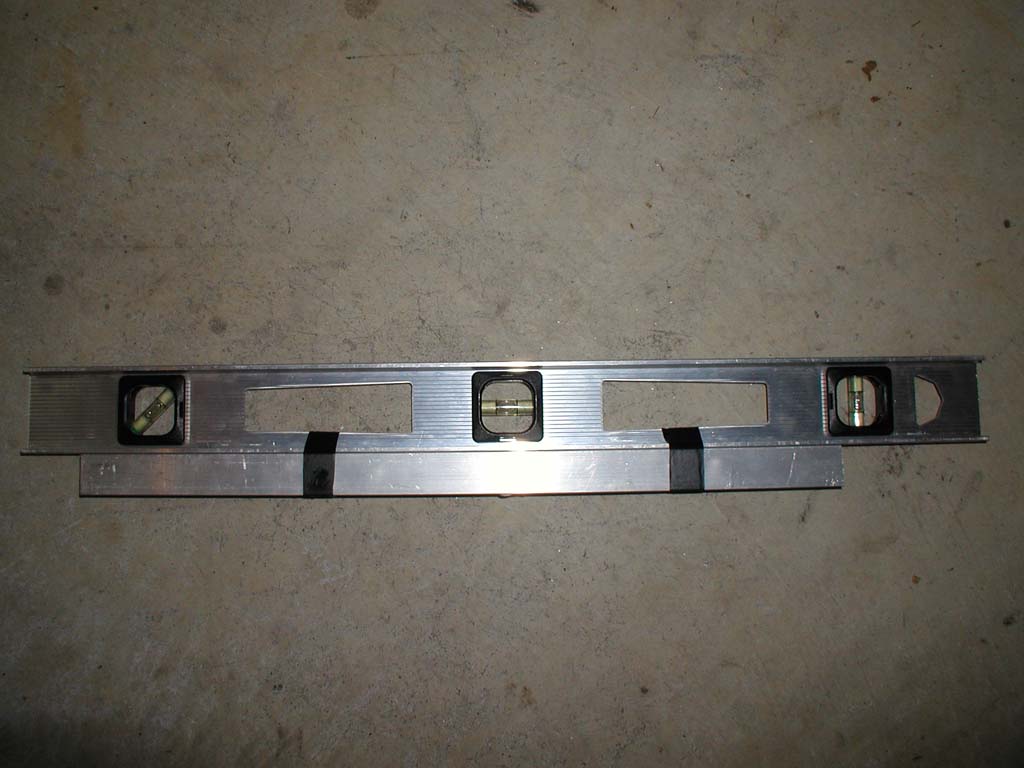
modified level
Camber:
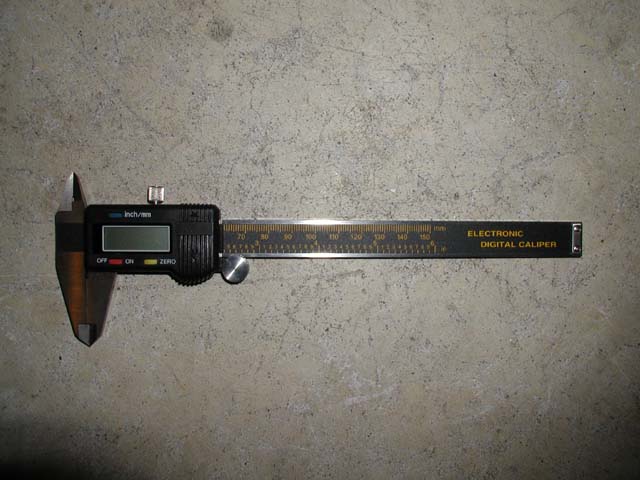
digital caliper
Here's the tools that you'll need to measure toe:
Tape measure: Preferably with mm graduations. Used to measure toe between the
wheel and parallel line.
String: Nothing too thick, or too thin. I used a kite-type string. Used to
create the parallel line to measure against.
Jack stands: Raise them so one of the notches is even with the center of the
wheel. If you want to do all 4 wheels at the same time, you'll need 4 jack
stands. The jack stands are used to hold the string taunt along a parallel
line down the side of the car.
Here's the tools that you'll need to measure camber:
Modified level: To check camber, you need to have a perpendicular plane to
compare the wheel angle too. The level is used to find the perpendicular
plane.
Digital Caliper: I have this fancy digital one (from Harbor Freight - cheap). A
dial one will work fine too - but the digital is easier. Used to measure
distance between the top of the wheel and the modified level.
I also recommend that you get some 8" or so lumber and ramps so that you can
get underneath the car to access the adjuster bolts. It will make it much
easier than jacking the car, adjusting, lowering the car, and rechecking. This
is mainly a pain for toe, as you'll have to recheck your parallel lines if
you jack up the car.
CHECKING TOE:
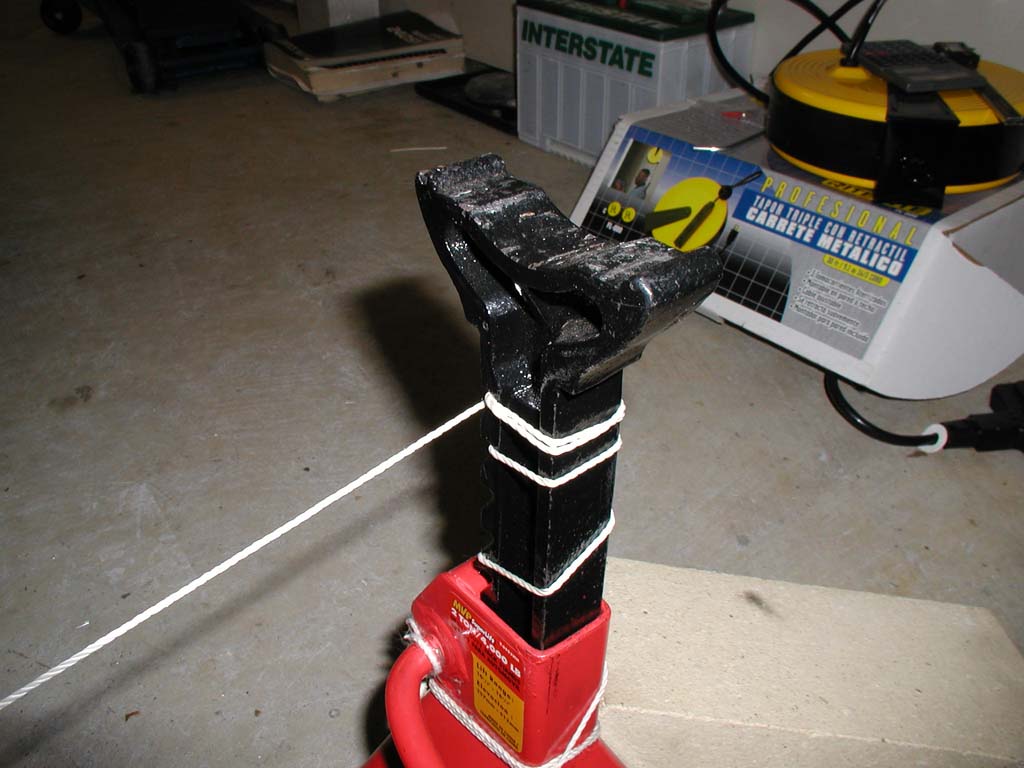
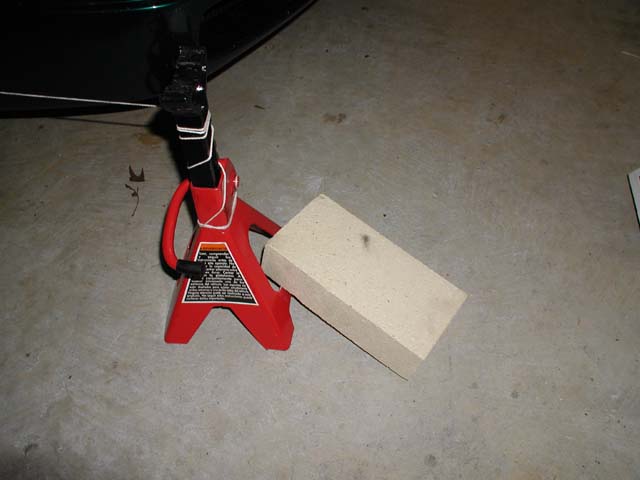
Tie the string around each
jack stand at the notch.
Use a brick to hold 'em down
so you can make the string taunt.
2 stands to a side, with
string between them.
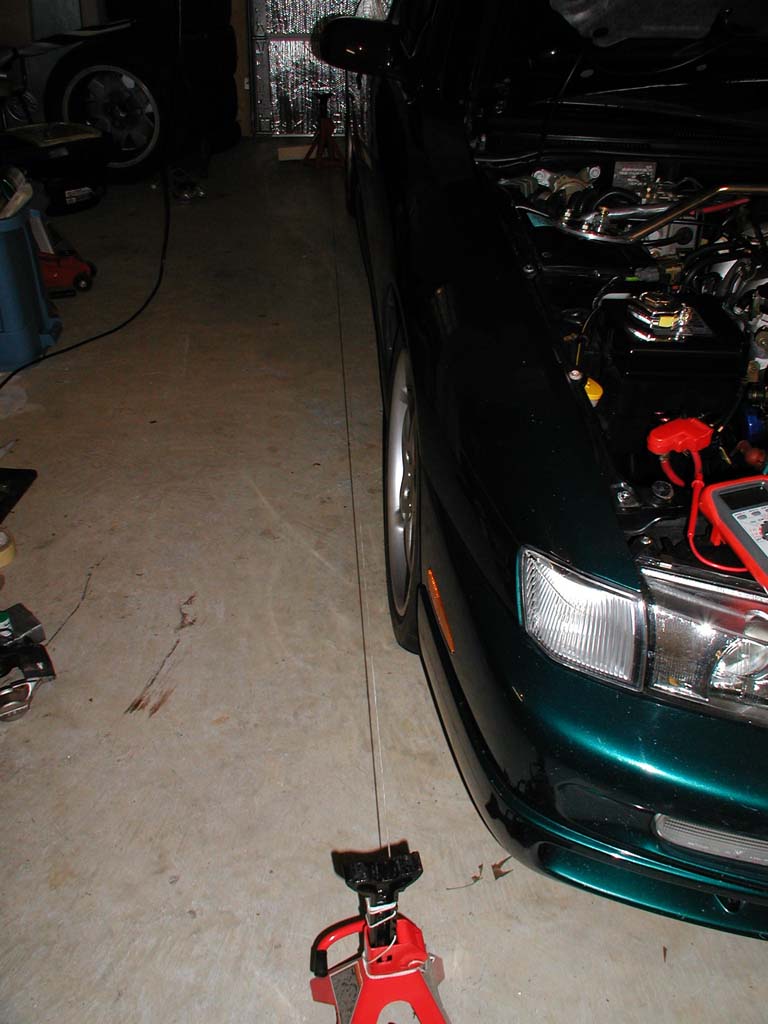
First off, set things up so you can measure toe. The concept here is to use
the jack stands to hold the string nice and taunt between them. You line
up the string parallel to the car, and can measure the front/rear of the
rim as an indication of toe.
Before getting started, park the car with the steering straight. When you pull
into your work area, drive in forward, and do not allow the car to roll
backwards at all. If you've just jacked up the car, bounce the car a bit to
settle the suspension.
Grab your jackstands, and raise them so the top notch is even with the center
of the wheel. I use the notch as a string guide.
Set your jack stands about 1 foot forward of the tire (at the front of the
car), and 1 foot rearward of the tire (at the rear of the car). Both
jackstands should be about 6 inches outward from the car. 2 jackstands
per car side. Wrap the string tightly around the jackstand (make sure it can't
slide out when pulled), and wrap as shown in the first picture (it's best to
wrap so the string going along the car is in the notch).
Get the string pretty tight as you wrap around the jackstand at the other
end of the car. Repeat for the other side of the car.
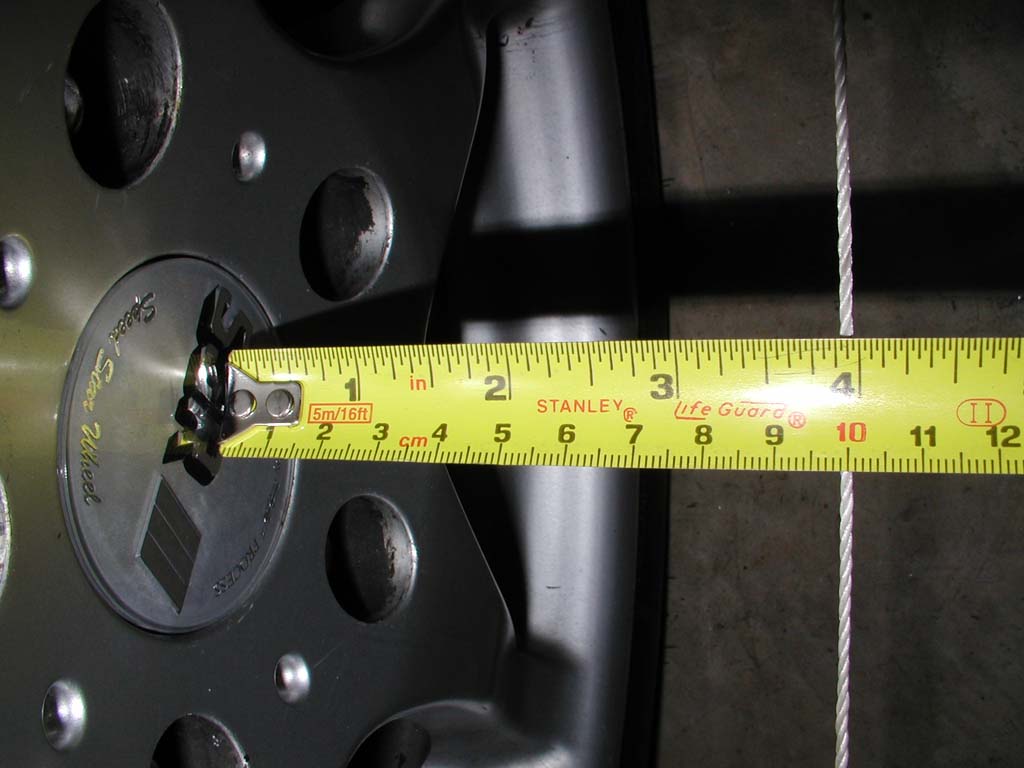
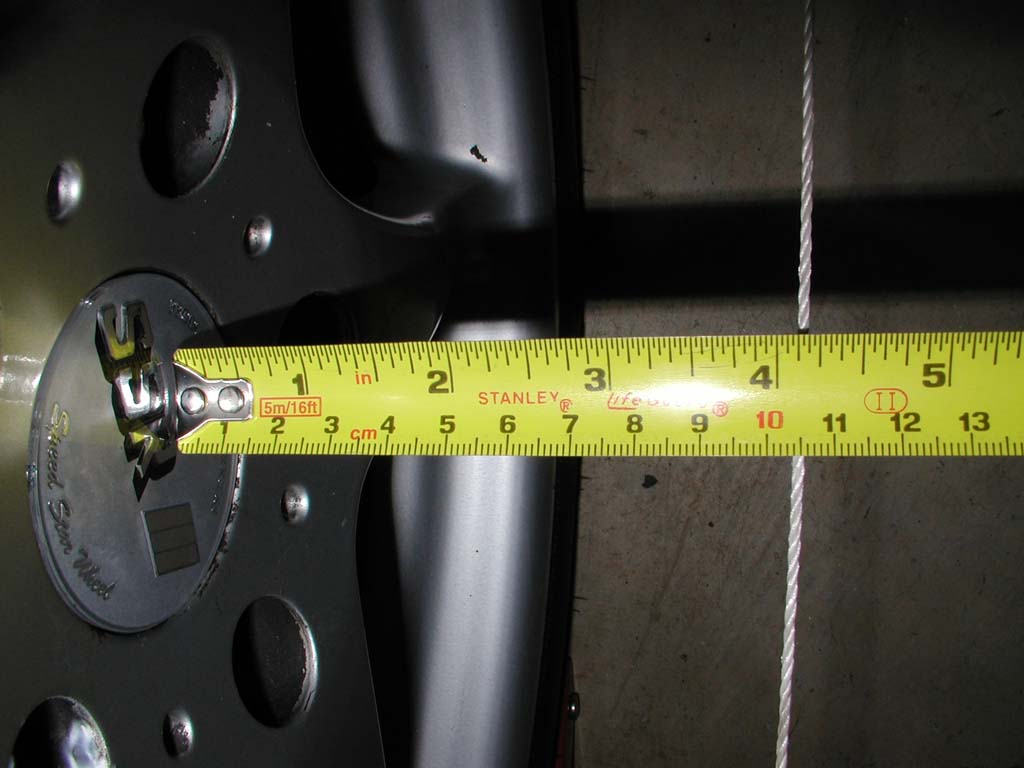
I always measure 100mm
from the FRONT hub center.
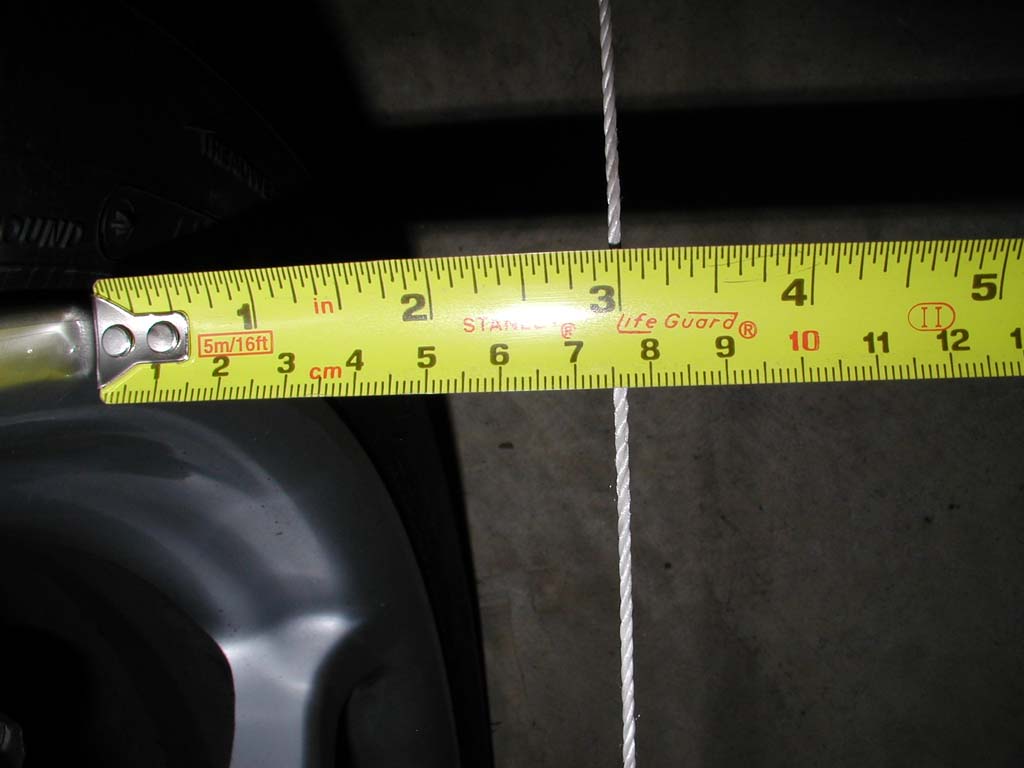
For S14, measure 105mm from the
REAR hub center (S13 is 102.5mm)
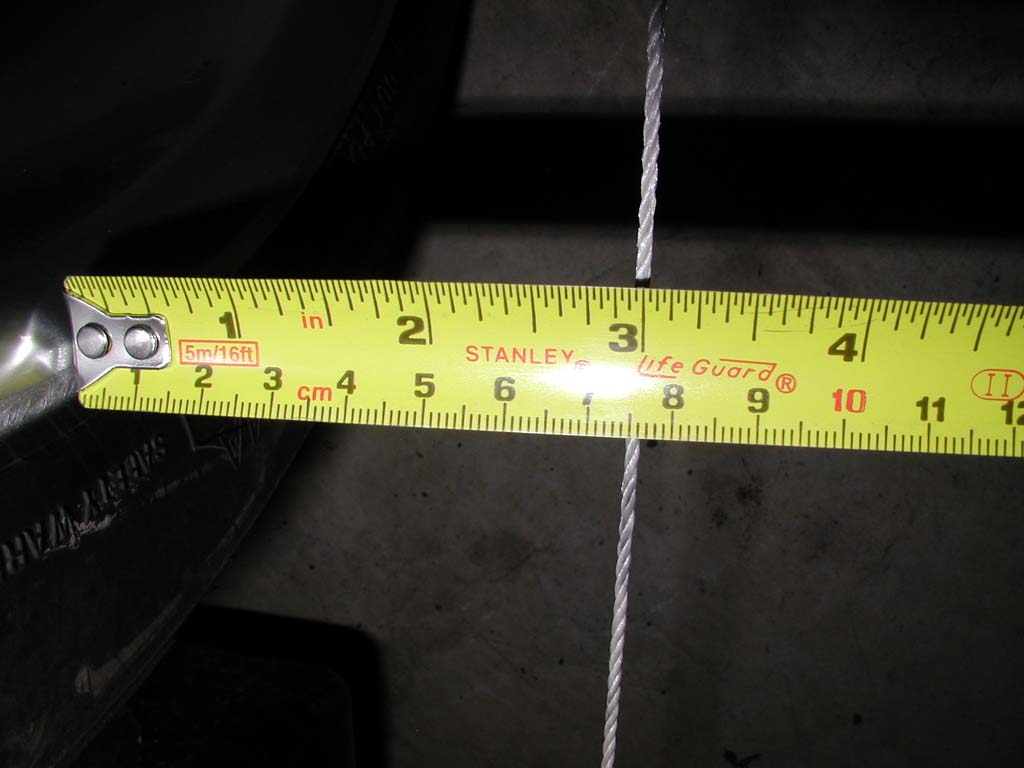
Measure at the rim towards the
front of the car. (76mm here)
Measure at the rim towards the
rear of the car. (75.5mm here)
Most DIY alignments recommend you find the centerline of the car. That's
great, but is a pain in the backside. As an easier alternative, I use the
hub centers as the point of reference for setting up the parallel string.
It's best to have matching front/rear center caps here, and to also know your
car's track front/rear. The 240's have either:
S13: 57.7" (F), 57.5" (R)
- difference of 0.2" total, front to rear
- difference of 0.1" per side * 25.4mm/inch = 2.5mm
S14: 58.3" (F), 57.9" (R)
- difference of 0.4" total, front to rear
- difference of 0.2" per side * 25.4mm/inch = 5mm
If the track in the rear of the car is less than the front (as the 240 is),
INCREASE the distance to the string in the rear.
If the track in the rear of the car is greater than the front (like a Miata),
DECREASE the distance to the string in the rear.
To be consistent, I always measure the distance from the front hub to the
string as 100mm, and then adjust the rear as needed (+2.5mm = 102.5mm for S13,
+5mm = 105mm for S14)
So a parallel string setup along the side of a S14, would measure 100mm to the
center of the hub in the front, and 105mm to the center of the hub at the
rear.
Now that you have the parallel line, take 2 measurements per wheel. Measure
the distance from the rim to the line at the front most part of the rim and at
the rearmost part of the rim. Try to keep the tape measure as perpendicular to
the parallel line as possible. Look over the top of the tape down on the line
to make sure you are not looking diagonally across the tape and line. Take the
two measurements:
rear(mm) - front(mm) = __mm toe
Example:
75.5mm - 76.0mm = -0.5mm toe in.
Subtract the measurement from the frontmost part of the rim, from the rearmost
part of the rim. Negative means you have toe in. Positive is toe out. To
determine the toe angle, first determine your rim size in mm. You should
measure this from one edge to the other (my 17" rim is 18" from one measured
point to the other). 18 in * 25.4 mm/in = 457.2mm. Use this to determine
angle like this:
inverse tan( __mm toe / __mm rim size )
Example:
inverse tan( -0.5mm toe / 457.2mm rim ) = inv tan( -0.0011 ) = -0.063 deg
Same as before - negative angle means toe in. This measurement is for one
side only. Take the measurement on both sides and add them together to get
total toe for the car. Example:
left measured toe: -0.5mm
right measured toe: -1.0mm
total: 1.5mm of toe in
Adjustment to toe is usually done (in the front of the car) with the tie rod
ends. Remember to re-check steering wheel straightness, and to wiggle it a
little (always going back to perfect center) whenever you adjust the tie-rod
ends.
CHECKING CAMBER:
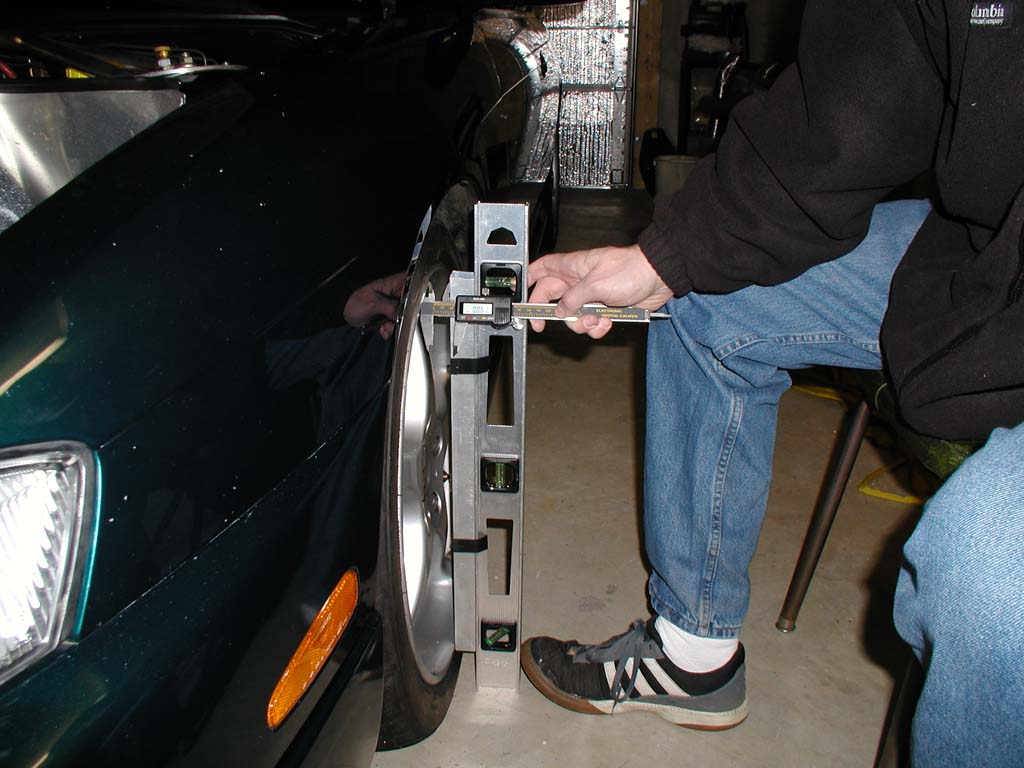
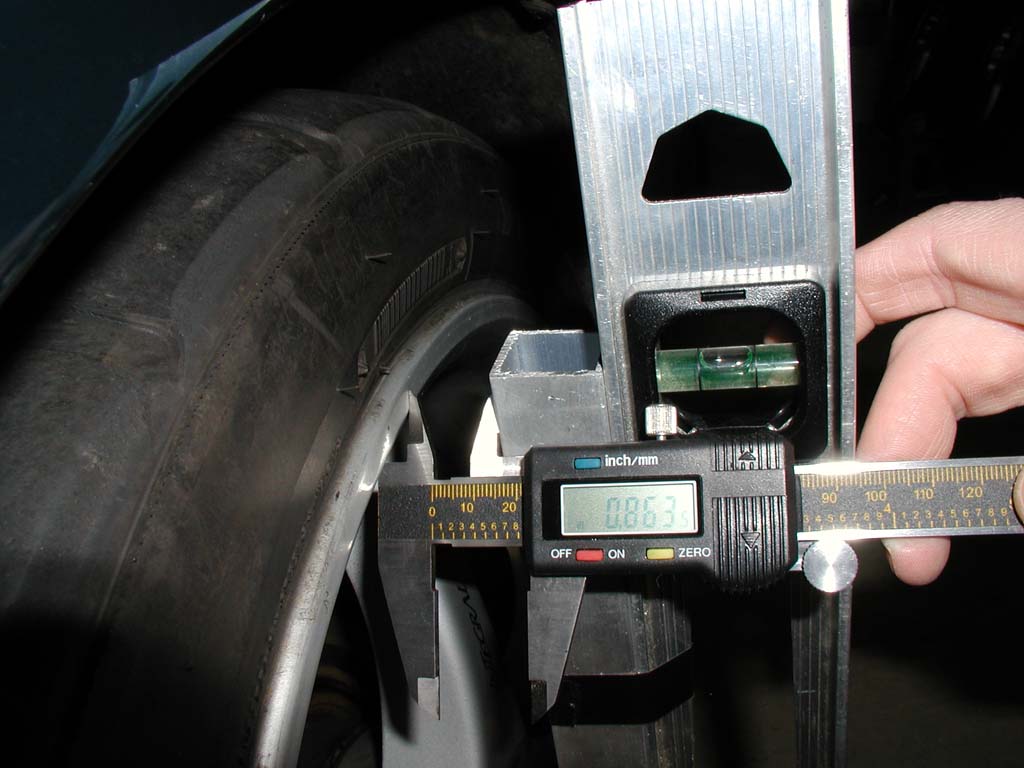
I put my foot on the bottom
to ensure it's tight to the rim.
Measure from the rim to the
bar, with the level even.
0.863in = 21.92mm
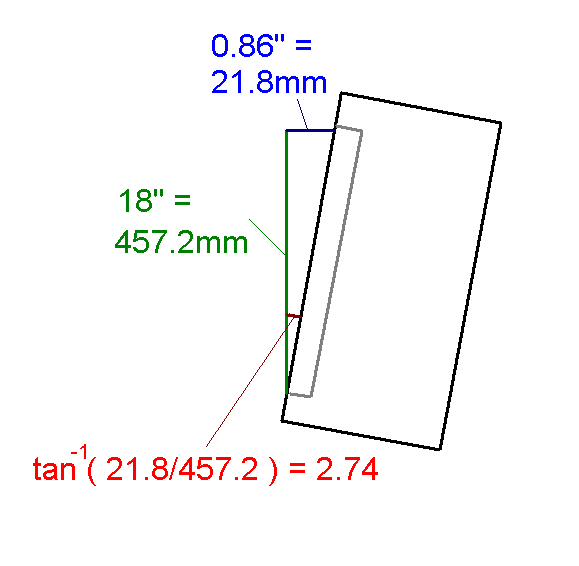
Diagram of the measurements
and calculation needed.
Checking camber is a heck of a lot easier than toe. The main tool I use is
a slightly modified level. I cut a piece of aluminum square bar stock to match
the height of the rim. This is not the listed wheel diameter (which is the
diameter that the tire is mounted on), but the wheel diameter plus the size of
the mounting rim that you will measure against. In my case, a 17" wheel is
really 18" (457.2mm) from top to bottom.
I just taped the bar stock with electrical tape, so that it could slide a bit
on the level. This is good because I want the end of the bar to sit on the
lower part of the wheel, not the tire. So I slide the bar so the level can
sit on the ground while the bar sits nicely on the lower rim.
With the level against the wheel, place the digital caliper between the rim
and the level (as shown). I really pull the level out about 1.5" or so to
start with, and then slowly push it in (which compresses the caliper too)
as I watch the bubble in the level. When the bubble is perfectly centered,
get the reading from the caliper (0.863in = 21.92mm in the pic).
The camber angle is easily calculated with the formula:
Or, if you like using inches (I use inches when measuring camber):
inverse tan( 0.863in / 18in ) = 2.7 deg camber
MAKING IT A LITTLE EASIER:
(hopefully)
I received an email a little while ago from Almir Delic. He had come up with an
Excel spreadsheet to help him calculate what he needed to get the toe settings
he wants. It was a great idea! So I took his thoughts and expanded his original
Excel sheet. I've included it here for you. Fill in the red fields with
your known values, and the green fields are calculated for you to measure on the
car. I hope it makes things easier - but there are a lot of fields to consider.
Here's a field-by-field explanation. If the field wants mm, but you have inches - simply multiply by 25.4. If the field wants inches, but you have mm - then simply divide my 25.4.
TOE:
"inch diameter wheels" (red) : enter the diameter of your wheels, in inches.
"mm front track" (red) : enter the front track of the car (wheel-center to wheel-center) in mm. Can usually be found on Carpoint
"mm rear track" (red) : enter the rear track of the car (wheel-center to wheel-center) in mm. Can usually be found on Carpoint
"mm front rim plane to centercap" (red) : looking in the plane perpendicular to the ground, and flat with the outside of the wheel, most wheels have a rim that sticks out further than the centercap. Put the level across the outer rim, and measure how deeply set the centercap is in mm. If the centercap sticks out past the rim, this value should be negative.
"mm rear rim plane to centercap" (red) : looking in the plane perpendicular to the ground, and flat with the outside of the wheel, most wheels have a rim that sticks out further than the centercap. Put the level across the outer rim, and measure how deeply set the centercap is in mm. If the centercap sticks out past the rim, this value should be negative.
"mm to rope from front center" (green) : measuring from the front wheel centercap to the string parallel to the car in mm. Move the string such that it meets this value. (Note that moving the rope on either end requires rechecking at the other).
"mm to rope from rear center" (green) : measuring from the rear wheel centercap to the string parallel to the car in mm. Move the string such that it meets this value. (Note that moving the rope on either end requires rechecking at the other).
"deg of FRONT toe in (+) or out (-) PER SIDE (red) : toe is measured different ways - either with an absolute measurement (such as X mm of toe) or with an absolute per side measurement (such as Y mm of toe per side) or using an angular measurement (such as Z degrees), or using an angular measurement per side (such as Z/2 degrees). The best is using the degrees (or in our case, degrees per side - which is just total degrees divided by 2), since the mm/inch measurements change depending on how far from the wheel center you measure them. For TOE IN, put a positive angle, and for TOE OUT, put a negative angle. If you have per-side or overall toe absolute measurements, simply adjust the angle until the boxes for "mm of TOTAL toe in (+) or out (-)" or "mm of PER-SIDE toe in (+) or toe out (-)" match what you want.
"deg of REAR toe in (+) or out (-) PER SIDE (red) : toe is measured different ways - either with an absolute measurement (such as X mm of toe) or with an absolute per side measurement (such as Y mm of toe per side) or using an angular measurement (such as Z degrees), or using an angular measurement per side (such as Z/2 degrees). The best is using the degrees (or in our case, degrees per side - which is just total degrees divided by 2), since the mm/inch measurements change depending on how far from the wheel center you measure them. For TOE IN, put a positive angle, and for TOE OUT, put a negative angle. If you have per-side or overall toe absolute measurements, simply adjust the angle until the boxes for "mm of TOTAL toe in (+) or out (-)" or "mm of PER-SIDE toe in (+) or toe out (-)" match what you want.