
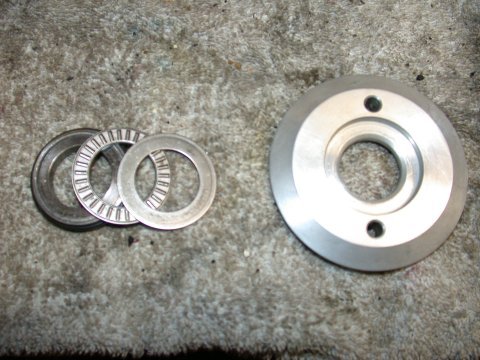
After fitting the Koni shocks and Cusco camber plates to "Rusty" there was some degree of concern regarding the ride height. As installed the front strut was adjusted right to the bottom of the threaded collar and the rear shock was threaded right to the top fo the collar in order to obtain a level ride height. This left no room for additional ride height adjustment. The car did sit about an inch lower but something wasn't quite right. I had feared I might need shorter springs in the front to compensate. The new race car, however, came fitted with Ground Control camber plates which not only adjust for camber but caster as well. Also the GC camber plates use a torroidal roller bearing arrangement to support the weight of the car rather than allowing the entire weight of the car to rest on the spherical bearing as with the Cusco camber plates.
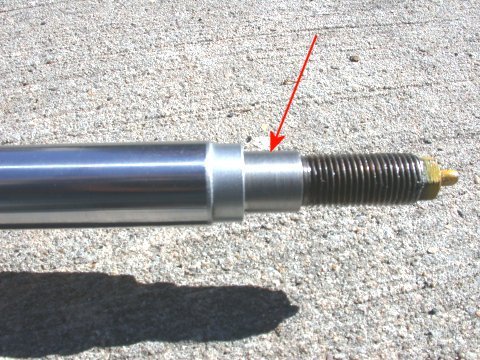
The issue with the Koni shocks and GC camber plates apparently is with the diameter of the piston shoulder upon which upper perch rests. In short it is too big. The KYB's fit BTW. This results in the upper perch, or camber plate bearing as in the case here, sitting on the first shoulder where the threads start and not on the second shoulder about a half in lower where it should sit! How to fix this was going to be tough. I called GC to see if they offered a spherical bearing for their camber plates with a larger diameter bore to fit the Koni's...no dice. They were however kind enough to fax me the specs to have the Koni strut piston shoulder machined down. How in the heck am I going to find a machine shop willing to turn down two shocks for me? It was my destiny I guess that a friend stepped up who volunteed his brothers help who has access to a machine lathe capable of doing the job and who knew exactly what needed to be done...AMAZING. Unfortunately it meant completely disassembling the front struts which after all was done wasn't too bad actually. the strut inserts came out of the OEM housings without too much grief. The lathe could only accommodate the strut insert. With inserts in hand and a GC camber plate off I went to the machine shop. An hours worth of work and the promise of repaying the favor some day I was back in business.
With the strut now turned down to the right size reassembly was in order. The only difference now being the use of the GC camber plates with the special roller bearing and upper spring perch with recessed area for the bearing. The below chronicles the reassembly process.
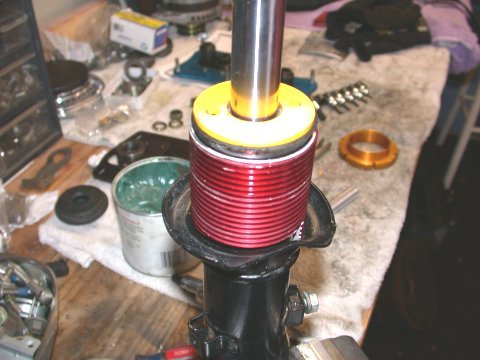
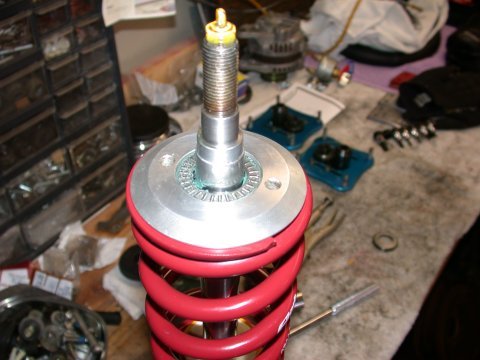
Strut and threaded sleeve are pressed into the housing together to get a good seal with the rubber "seal."
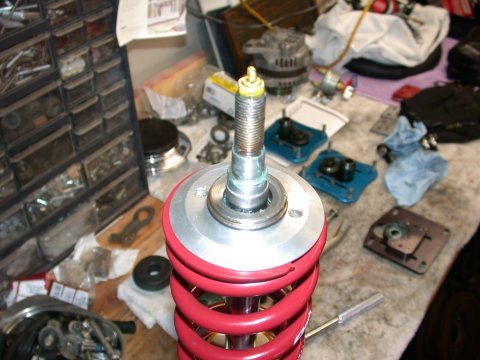
Lower spring seat, spring and upper spring seat are dropped onto the strut (don't forget the bump stop) and the roller bearing race and bearing are installed in the upper spring seat.
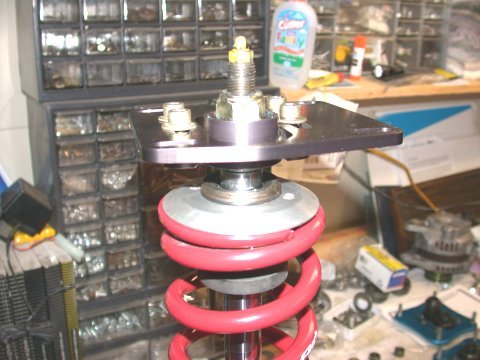
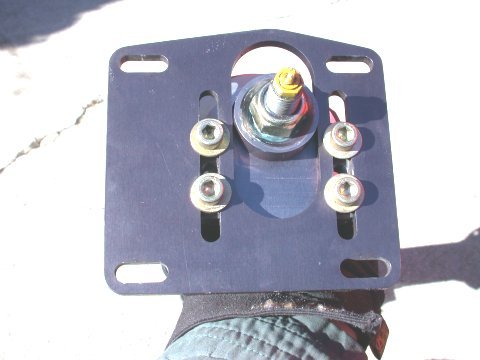
The top bearing race is installed - note beveled edge up. Finally the camber plate is slid
onto the top of the strut piston and lock nut installed.
So there you have it. The ride height mystery solved and GC camber/caster plates installed. With the new arrangement the lower spring perches are set at midheight both front and rear and overall the car sits about an inch lower that stock.
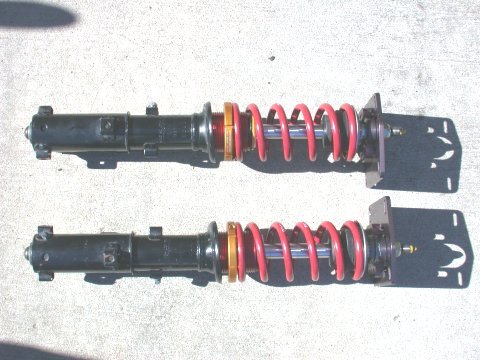
The complete front strut assembly.
7-UP CLUB
MAIN
OUR "LOCAL7"
COMMUNITY | THE
WORLD OF THE RX-7
This page last updated April 12, 2004